This report was done for course Tunkeutumistestaus ict4tn027-3007 organized by Tero Karvinen. The course information and assignment descriptions in finnish can be found at https://terokarvinen.com/2021/penetration-testing-course-2022-spring/.
The system used was a Kali Linux version 2022.01 with latest updates installed at 11:05 on 31.03.2022. The system was running as a virtual machine in VirtualBox. VirtualBox version was 6.1.32.
a) Solve levels 0-4 in OverTheWire.org Bandit.
Level 0
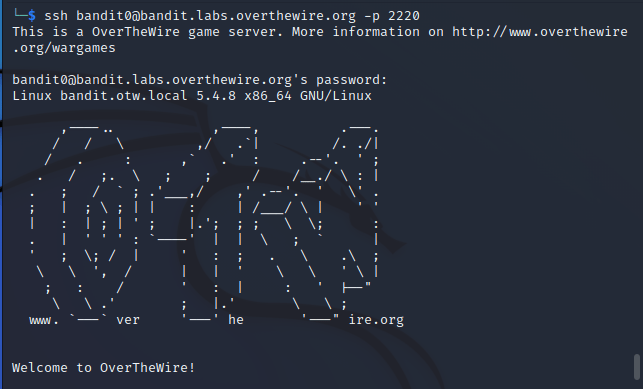
Solving level 0 was simple. The first step was to establish a SSH connection to bandit.labs.overthewire.org on port 2220 with username “bandit0” and password “bandit0”. The command I used to establish the connection was
ssh bandit0@bandit.labs.overthewire.org -p 2220
I entered the password and the login was successful.
Level 1
After the successful login I was able to access the “readme” file in the user’s home directory. I opened the file with nano, copied the password and closed the SSH connection. Then I moved on to level 2.
Level 2
The process to connect to the machine was same as in the previous level, except that the username was different, “bandit1”. I established the connection successfully with the password acquired from the previous level.
This time the password was stored in a file called “-“, which introduced a problem while opening it. I tried to open the file with command “nano -“, but ran into “reading from stdin, ^C to abort. Directory ‘-‘ is not writeable” error. I solved it by specifying the location of the file with the command below. The “./” means current folder and “-” is the file.

I was able to retrieve the password from the file and moved on to the next level. I closed the SSH connection.
Level 3
The command I used to connect to the machine was the same as previously, but with username “bandit2”. This level gave another challenge in the form of having spaces in the filename. If someone wanted to manually enter the filename, they would need to add the escape character before every space. Otherwise the file is not opened and finishes with an error. I always use tabulator to autofill the filenames, so this level provided no challenge this time as the autofill took care of the proper formation. The command to open the desired file looked like this

I copied the password from the file, closed the SSH connection and moved on to level 4.
Level 4
I connected to the machine with the same command as before, but with username “bandit3”. Inside the machine there was a folder named “inhere”, which seemed to be empty. I used command “ls” with parameter “-a” to display all the files within the folder, including the hidden ones.
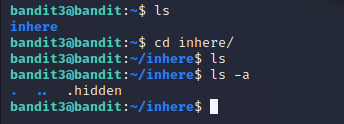
I was able to find a file called “.hidden”, which I opened with nano. Inside was the password to the next level. I saved it locally so I can continue later from this point.
b) Install Kali Linux
I had one instance of Kali Linux installed in VirtualBox, but I did a new, clean install for this assignment.
First I downloaded the system image file from the official site at https://www.kali.org/get-kali/#kali-virtual-machines. Since I was using VirtualBox as the virtualization software, I naturally picked the 64bit option specifically designed for VirtualBox use.
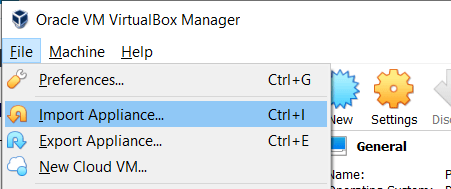
The downloaded file was .ova file, which is used slightly different in VirtualBox compared to the more common .iso file. The .ova files do not need to have an virtual machine set up before installation, but it is automatically created while unpacking the image. The .ova files are not mounted in the optical drive of the machine either. I performed the unpacking in VirtualBox by navigating to “File” menu and picking option “Import appliance”. If one does want to use the shortcut, the same option can be picked by pressing “ctrl+I”.
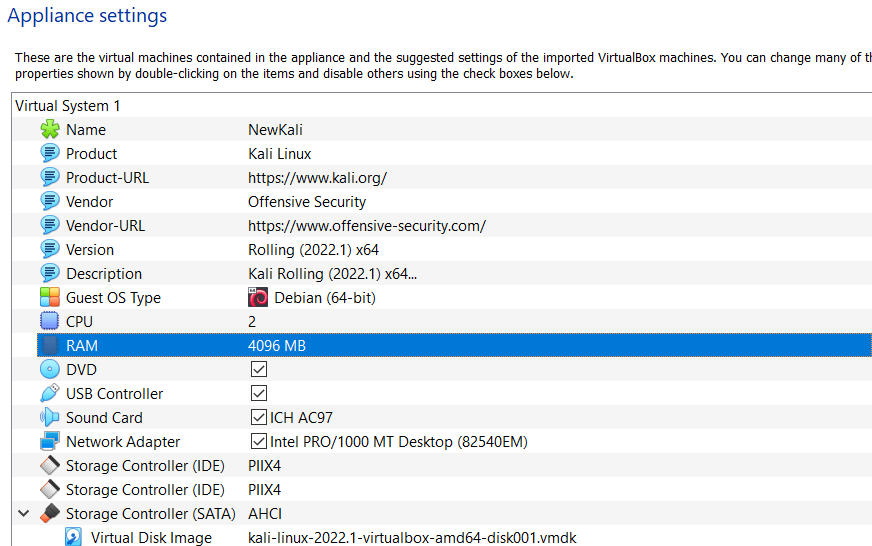
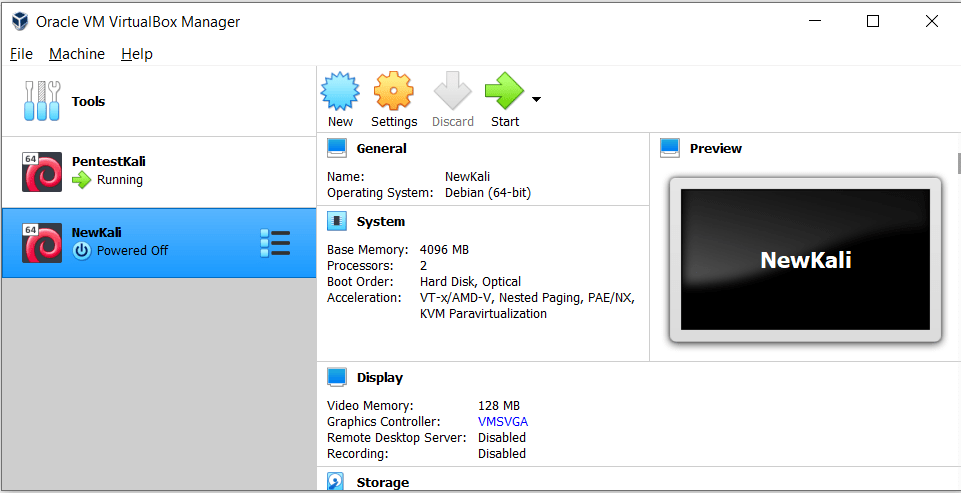
Next the program asked to input the file to use. I picked the file from my computer’s file system and continued forward. In the next view the virtual machine specifications were presented. The only changes I did was to increase the memory from 2048MB to 4096MB and rename the instance as “NewKali”.
Then I clicked “import”. The installer presented me with a prompt to accept the GPLv3 license that Kali is using. I clicked “Agree” and the import began. The operation took just about the time required to grab a cup of coffee, 3 minutes in total. No errors occurred in the import. The machine was now ready to be used.
c) Install WebGoat, create a local user and log in
This part required some research as there are multiple ways to run WebGoat. WebGoat documentation offers amazing instructions on this. One possibility is to use Java environment and run WebGoat as a standalone program. Second option is to use WebGoat directly from the GitHub repository. The third option is to run WebGoat in Docker. I chose the first option, as it seemed to be the simplest one.
First I downloaded the required files from WebGoat GitHub at https://github.com/WebGoat/WebGoat/releases. Then I disabled all networking of the machine from settings. I navigated to the “Downloads” folder and I started the program with command
java -jar webgoat-server-8.2.2.jar [--server.port=8080] [--server.address=localhost]
Things did not go smoothly from here, as I ran into a problem with the Java version. The program exited with error
Exception in thread "main" java.lang.UnsupportedClassVersionError: org/owasp/webgoat/StartWebGoat has been compiled by a more recent version of the Java Runtime (class file version 59.0), this version of the Java Runtime only recognizes class file versions up to 55.0Next logical step was to update Java to a newer version. First I turned on the internet connectivity from settings. With little research from WebGoat official page I found out that the required Java version is 15 or newer.
I searched the cache of the repository apt-get uses with command “apt-cache search openjdk”. I saw the latest version being version 17 and ran command
sudo apt-get install openjdk-17-jre -y
to install the new version. Installation was quick and no errors happened. I confirmed the new Java version with command “java -version”.

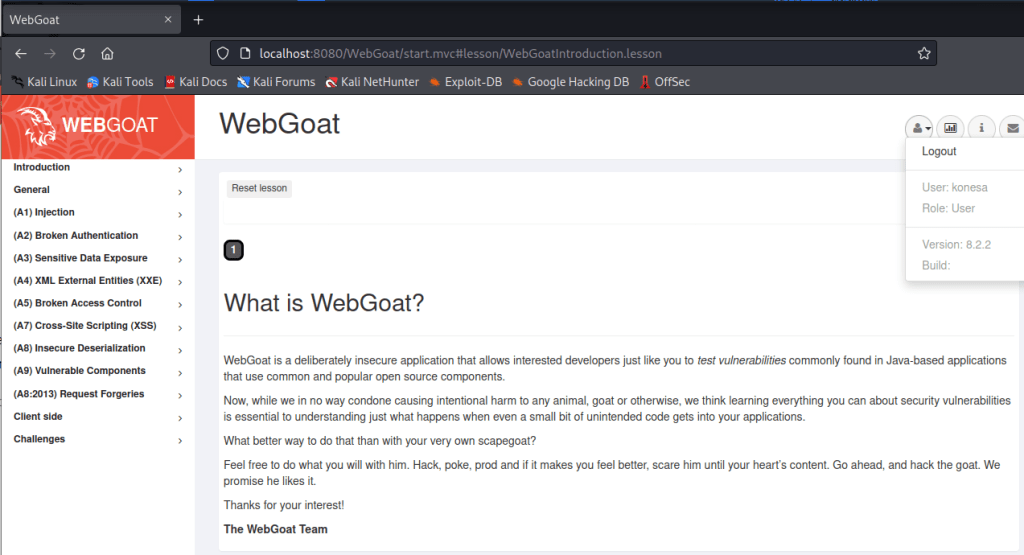
I disabled the internet connectivity and ran WebGoat again with the same command as previously, this time the program launched correctly. I navigated to “localhost:8080/WebGoat” and was greeted with a login page as expected.

Next I created a new user for myself by clicking “Register new user”. The site automatically logged me in after the account was created.
d) Solve WebGoat exercises General -> HTTP basics and Developer tools
HTTP basics:
From the source I was able to see that pressing “Go!” button initiates a POST request on a function from file “/WebGoat/HttpBasics/attack1”.

The POST operation could be also seen in the networking. It was the only request using the “attack1” function.

The second question was what is the secret number. The number could be seen in the source of the page by navigating to “attack container” division. I came to the conclusion by the hint “F12: Inspector” on Tero’s site.

Developer tools:
In the Developer tools assignment, the first exercise was to read through the basic information and then use the Developer tools Console to run command webgoat.customjs.phoneHome().

The second exercise involved using the network tool to find out a random number sent in one of the requests. The wanted request was a POST request that was sent after the “Go!” button was pressed. The request was easy to find as it was the only POST request, and the number could be seen under “Request” tab in Network tool.

e) Solve one challenge from Challenge.fi
EDIT 04.04.2022!
The solution was moved to a password protected page due to the challenge still being open and running. Password in Moodle under comments for this assignment.
https://esakontio.com/challenge-fi-antagonist-solution/
f) TryHackMe or HackTheBox. Register, read and accept the rules, open a VPN connection, solve one challenge (or sub-tasks) in one of the platforms
I already had accounts in both of the platforms so there was no need to register. I have done some of the learning paths in TryHackMe before, lastly parts of the Penetration testing and Nmap paths. In HackTheBox I never have completed any of the tasks or solved any challenges, so I decided to tackle the “Meow” challenge from starting point.
First I had to download the OpenVPN file to connect to the network where the machine is located in. It was available by clicking the “Starting point” button in the upper right corner and then choosing the “Starting point” option. I navigated to Downloads folder and opened the VPN connection with command
sudo openvpn <filename>
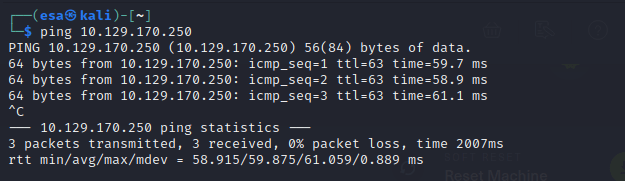
The connection established successfully, but after a couple of minutes of waiting I was still unable to spawn the machine in the network. I had to reload the page to be able to do that. I tested the VPN connection by pinging the machine address, which is not located in the public internet. I received the expected response.
There were nine questions in the exercise. The questions were easy, majority of them I answered even without connecting to the machine. Except for the last two, which were more machine-specific.
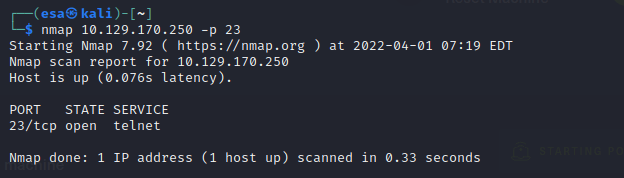
For question seven I ran a port scan by using nmap on the machine to see what is running on port 23. I knew it is the default port for telnet service, so I suspected the correct answer might be telnet. The port scan confirmed my idea of this.
Questions 8 and 9 were asking for the username that worked in the machine and for the flag that was inside the “flag.txt” file. I was able to log in by using telnet with user “root” and captured the flag from the file.
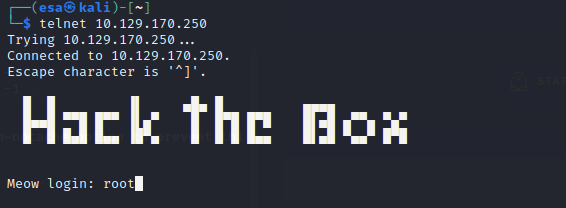
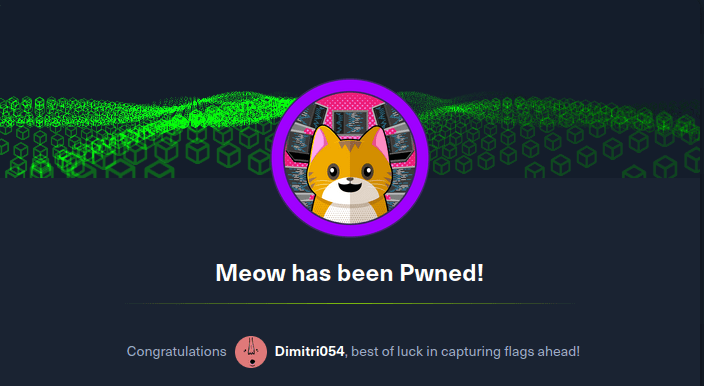
The machine was now pwned.
z) Read and summarise in few bullet points
First article: https://lockheedmartin.com/content/dam/lockheed-martin/rms/documents/cyber/LM-White-Paper-Intel-Driven-Defense.pdf
- APT = Advanced Persistent Threat, threat with intent on the compromise of data for economic or military advancement. High-level threat.
- When defending, it is critical to be as quick as possible with detections and prevention.
- The intrusion kill chain helps in moving from traditional vulnerability-focused processes to more complex data- and indicator driven models, which leads to more resilient defence.
- This model can even prevent zero-day vulnerabilities from being exploited long-term.
- Understanding the threat, not just the vulnerability, makes it easier to mitigate the risk
- What can the attacker do to obfuscate the attack and confuse the process?
Second topic is a podcast: https://darknetdiaries.com/episode/101/
- Would be interesting to know more about military/governmental level cyber security work. Sadly majority of it is not for the public eyes.
- The process of keeping the lottery balls safe sounds insane with 2 people watching over them all day and 10 locks on the drawer door.
- The big mistake for the perpetuator to skip winning on the week of the audits. Clear indicator of inside job.
- What OS did in Puerto Rico was a very extensive penetration test.
- One computer should not be able to access all parts of the network by default.
- The solution was fairly “simple” in the end, but the process was long. The process how the cheat was done was quite sophisticated too, with all the timings between the two persons and everything.
- Since it was not possible to modify the database without physical access, why didn’t they check the access earlier? Maybe they did, but it was not mentioned?
g) Optional: Solve OverTheWire: Bandit, levels 5-10.
I continued solving the OverTheWire Bandit. I had solved the first 5 levels before, so I was able to directly start with the next one as I saved the password. The command for connecting to the challenge was still the same
ssh bandit<level>@bandit.labs.overthewire.org -p 2220
Level 5
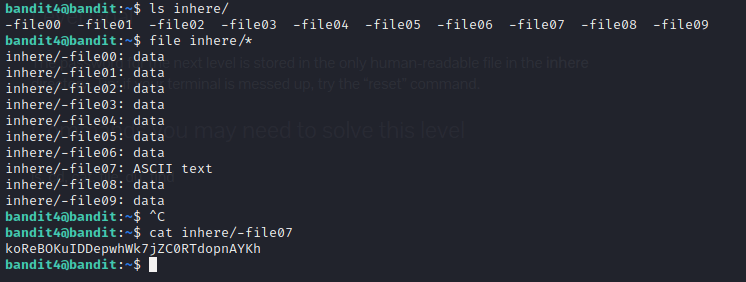
The next level presented a challenge in the form of non-human readable files and human readable files. I listed the files with command “ls inhere/” but realized it does not help me. So instead I used “file inhere/*” command to show the type of the files. There were only nine files to iterate, so even manually opening them one by one would still have been feasible. But using the file command was a bit faster in determining which file to open. The password was in file “-file07”.
Level 6
Level 6 provided a bit more complicated file system as I found out after running command “ls inhere/*” that there are multiple folders with multiple files in them. Next I chose to use “find” tool, as the parameters of the file were given in the level description. I opened the manual page and saw that “-size” parameter could work. I ran command “find inhere/* -size 1033” but no results were found. I started looking into it and found out that I was missing the “c” from the end of the file size, which means bytes. If no parameter for the unit was assigned, the program automatically searches for 512 byte blocks. My source for this: https://linuxize.com/post/how-to-find-files-in-linux-using-the-command-line/. After this little modification to the command, the correct file was found.

Level 7
Level 7 added even more complexity to the search. Using the same manual page as before for “find” I was able to determine the parameters for using owner and the group of the file as conditions. This introduced another problem, as the output was filled with “Permission denied” entries.
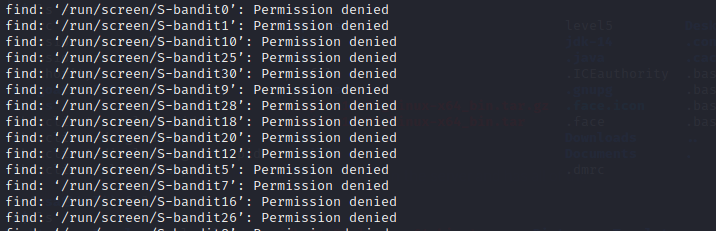
Going through all of them seemed a lot of work, so I researched how to remove them. An answer from StackExchange unix section helped me out https://unix.stackexchange.com/questions/42841/how-to-skip-permission-denied-errors-when-running-find-in-linux/42842#42842. With this information I was able to filter the useless entries and was left with only a few.

Level 8
The password to the next level was stored in a data.txt file next to the word “millionth”. First I opened the file with nano editor, and saw that it was in human readable form. This simplified solving the challenge, as I was able to search for the string “millionth” directly. The “Where is” search of nano returned a result of “This is the only occurrence” on line 37262. I simply copied the password and moved on.
Level 9
On level 9 I ran into a new problem that I have never solved before. I had to find an unique string from the data.txt file. I knew about strings command, so I started my research from that. The manual page provided no help or useful commands, so I had to try something else.
I got interested in the uniq command that was mentioned on the level description page. So I opened the manual page for the tool and saw that the program is only able to filter the unique lines from a file if the lines are sorted first. I also learned that the parameter for unique string is -u. So I first ran sort on the file to sort the lines alphabetically. The result was as expected.
Then I used uniq on the new output. I had to pipe the output from sort to uniq, so the whole command looked like this
sort data.txt | uniq -u
The result was only one line, which indicated success. I used the password on the next level.

Level 10
I faced more new challenges on the next level. This time the file was not in human-readable form. What I knew was that the password is preceded by multiple “=” signs. So I ran strings on the file to see what the output would look like. I was able to see that there were a few lines with quite a many “=” signs in the beginning. I was already familiar with using grep, so I ran strings and grep together on the file. The command I used was “strings data.txt | grep ====”. It returned a set of strings that formed a sensible output, which was not completely clean, but included the password.

I saved the password locally so I can continue from level 11 in the future.
